If you’ve ever looked at an ultrasonic cleaner and thought, “I could probably make one myself,” you wouldn’t be entirely wrong. With some technical curiosity, patience, and a reasonably equipped workbench, building a basic ultrasonic cleaning device is absolutely within reach for a dedicated DIYer. After all, the core components—transducers, signal generators, a liquid tank—aren’t impossible to acquire, and there’s something deeply satisfying about creating a high-tech tool with your own hands.
But let’s not sugarcoat it: the journey from “I think I can” to a working, safe, and effective cleaner is anything but plug-and-play. Unlike other household projects, ultrasonic cleaning involves high-frequency electronics, precise wave modulation, vibration management, and thermal control—all factors that interact in complex ways. A misstep in one component can result in poor cleaning results, damaged parts, or even safety hazards.
It’s easy to underestimate how much tuning is needed to get even cleaning across a tank or how sensitive certain materials are to uncontrolled cavitation. And while you might save on cost initially, the time investment in trial-and-error wiring, resonance testing, waterproof sealing, and safe enclosure design quickly adds up.
Still, for the right person—someone who enjoys tinkering, solving technical puzzles, and pushing hardware beyond its commercial boundaries—the DIY route is more than just practical; it’s genuinely fun. But knowing what you’re getting into is key. That’s why understanding the technology and its potential risks is the first—and most critical—step before diving in.
Understanding How Ultrasonic Cleaning Works

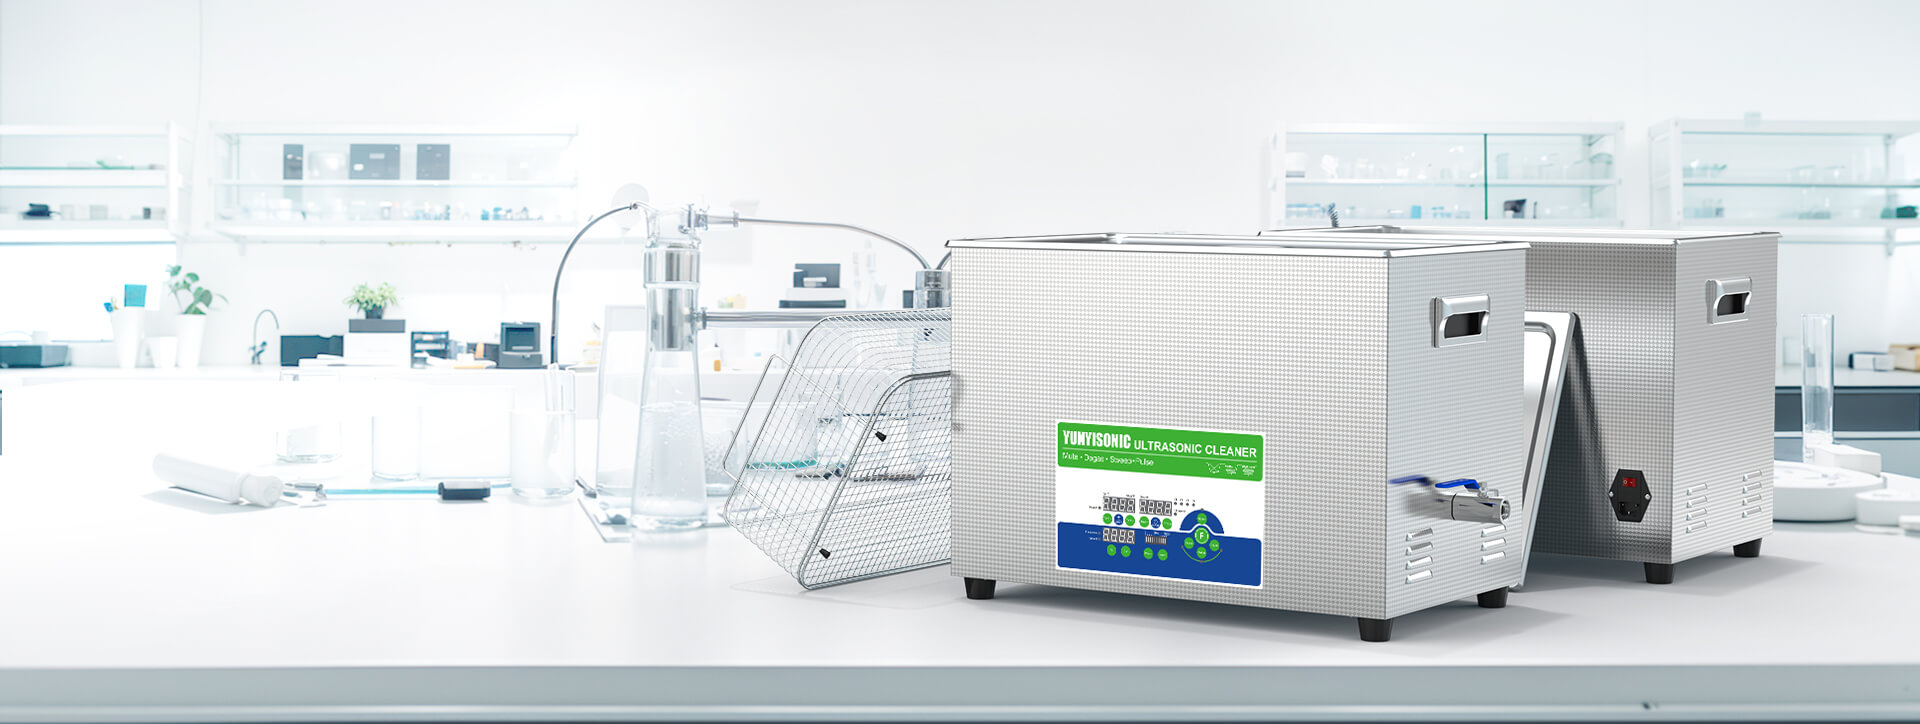
Ultrasonic cleaning machine in operation
Ultrasonic cleaning may seem like magic at first glance—drop an item into a vibrating tank, and minutes later, it comes out looking like new. But behind this seemingly simple process lies an elegant application of physics. The core mechanism is cavitation, a phenomenon that occurs when high-frequency sound waves (usually in the range of 28kHz to 120kHz) travel through a liquid medium, typically water mixed with a cleaning solution.
As the ultrasonic transducer creates alternating high- and low-pressure waves, microscopic bubbles form in the low-pressure phases. When these bubbles collapse violently during the high-pressure phase, they generate localized bursts of energy, heat, and pressure—enough to lift contaminants from surfaces, including carbon deposits, oils, flux residues, oxidation, and fine particles.
These bubbles are incredibly small—often less than 0.1 millimeters in diameter—so they can reach into the narrowest crevices, screw threads, mesh filters, or recessed grooves that would be otherwise impossible to clean manually. That’s why ultrasonic cleaning is widely used in industries like medical instrument sterilization, precision optics, aerospace maintenance, and semiconductor fabrication.
It’s important to note that different frequencies produce different cleaning behaviors. Lower frequencies (like 28–40kHz) generate larger, more aggressive bubbles ideal for removing stubborn grime or thick residues. Higher frequencies (80–120kHz) produce smaller, gentler bubbles better suited for fragile items like microchips, fine jewelry, and dental implants.
Key Components of a DIY Ultrasonic Cleaner
Building your own ultrasonic cleaner means sourcing and assembling the following key components:
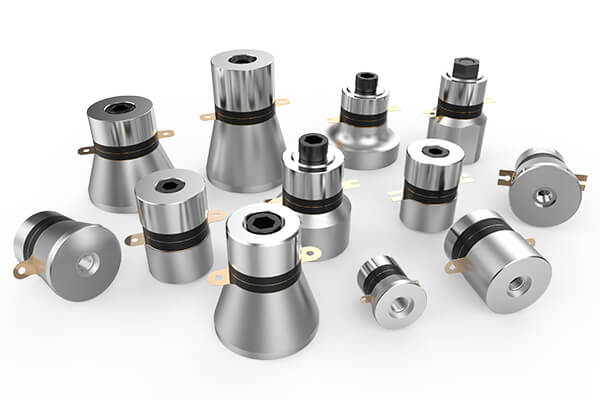
Transducers
Ultrasonic Transducer and Generator
This is the heart of your cleaner. The transducer converts electrical energy into mechanical vibrations, while the generator supplies the necessary frequency and power. For DIY setups, common piezoelectric transducers (used in foggers or humidifiers) can be repurposed, but they often lack the strength of industrial-grade versions.
Cleaning Tank
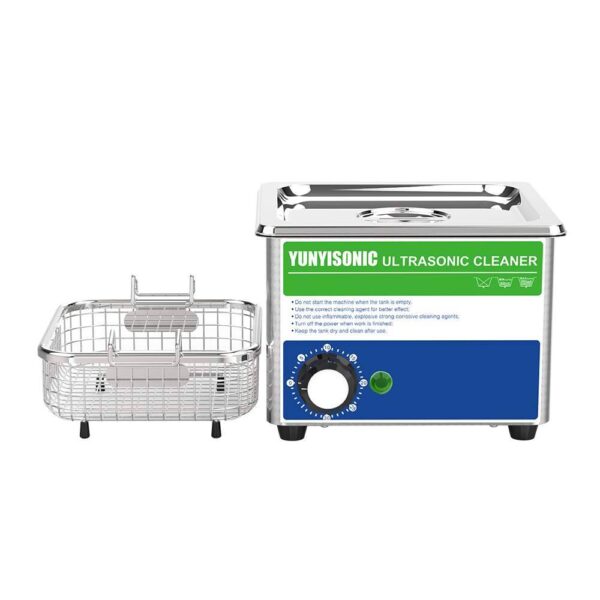
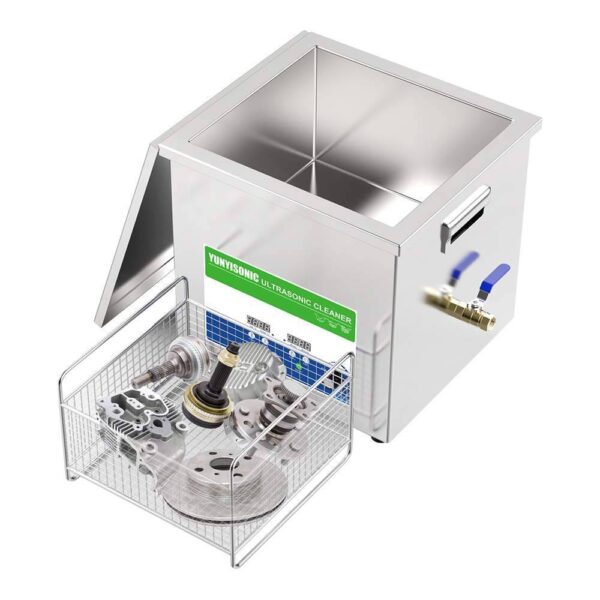
You’ll need a metal container, ideally stainless steel, to serve as the cleaning chamber. Metal conducts vibrations efficiently, which is essential for cavitation. Glass or plastic containers do not work well for this purpose.
Power Supply and Control Unit
A stable DC or AC power source that matches the generator’s requirements is necessary. Including a basic temperature controller or timer enhances functionality. Safety precautions, such as overload protection, are also critical.
Sound Insulation and Mounting
Ultrasonic cleaning can be noisy and generate vibrations. Your setup should include vibration-absorbing mounts and some form of acoustic shielding to reduce noise levels and maintain structural integrity.
Challenges and Limitations of the DIY Route
Building your own ultrasonic cleaner is no small feat—and not just because it involves electronics and mechanical assembly. The main challenge lies in replicating the precision and control that commercial ultrasonic systems offer. At a glance, it’s tempting to assume that any vibrating piezo element will do the job. But without proper design, tuning, and system integration, your DIY ultrasonic cleaner may suffer from weak cavitation, inconsistent results, or even equipment failure.
One of the most common limitations is power uniformity. Professional machines use well-calibrated transducers mounted in strategic configurations to distribute ultrasonic waves evenly across the tank. In contrast, many DIY builds generate hot spots or dead zones, which can cause uneven cleaning—some areas will be spotless, while others retain residue. This issue is particularly problematic when cleaning parts with intricate geometries or internal passages, such as carburetors or optical mounts.
Another hurdle is heat control. Cavitation naturally generates heat, and many store-bought systems include built-in thermostats or PID controllers to keep the liquid within optimal temperature ranges. DIY setups often lack this, leading to overheating, material fatigue, or damaged components. Without proper insulation or thermal management, the entire unit can become unstable or unsafe during extended use.
Noise is another frequently overlooked problem. Ultrasonic devices generate significant acoustic energy, and DIY setups typically lack the damping materials or enclosures that commercial units use to reduce noise pollution. What starts as a small workbench project can quickly become an unpleasant, high-pitched experience in confined spaces.
Furthermore, there’s the long-term reliability factor. Industrial-grade ultrasonic machines are designed to operate continuously over months or years. Homemade versions, even when well-built, usually have limited lifespans due to cheaper parts, less durable adhesives, and inadequate thermal cycling protection. If you’re planning to use ultrasonic cleaning regularly—whether for jewelry, tools, or lab equipment—the cost of repair and maintenance might eventually outweigh the savings of going DIY in the first place.
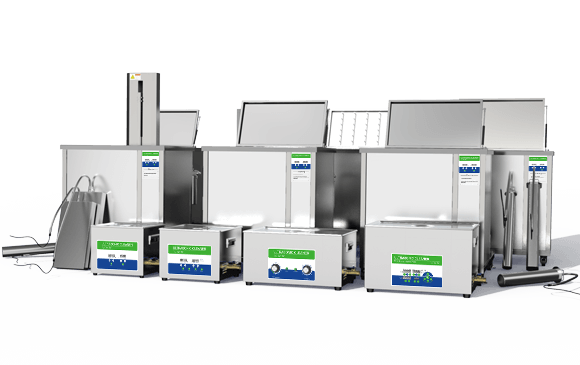
That’s why many users eventually pivot toward investing in professional equipment like Yunyisonic ultrasonic cleaners, which offer dual- or four-frequency configurations, automated temperature control, digital timers, and comprehensive safety features. They’re designed for both reliability and precision—qualities that are hard to replicate with DIY hardware.
When DIY Isn’t Ideal: Choose a Smarter Option
If you’re seeking professional-level cleaning results, especially for sensitive items like jewelry, lenses, dental tools, or electronics, investing in a tested and engineered product is often the wiser path. This is where Yunyisonic ultrasonic cleaners step in.
Yunyisonic offers a broad range of dual-frequency and triple-frequency、four-frequency models tailored for everything from household to industrial use. Their machines are equipped with precise digital controls, stable heating systems, and intelligent power modulation—features that are difficult to replicate in a DIY build.
More than just machines, Yunyisonic delivers complete cleaning solutions. Whether you’re a hobbyist or run a lab, repair shop, or jewelry studio, their machines offer unparalleled cleaning precision, efficiency, and safety. If you value your time and want reliability out of the box, Yunyisonic is the solution.
If you need to buy an cleaning machine, you can choose the following products:
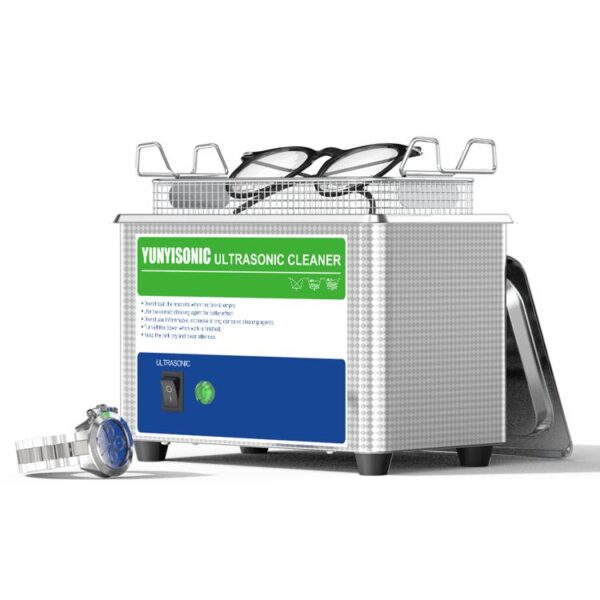
1.3L Mechanical Timer Ultrasonic Cleaner for Watches, Dental Clinics, Clock Repair, Optical Shops
In stock
| Volumetric Weight | 2.1 kg |
|---|---|
| Package Dimensions | 25.5 × 24.2 × 18 cm |
| Model |
YA013B ,YA013GB |
| Application Field | , , , , , , , , , , |
| Brand |
Yunyisonic |
| Origin |
Shenzhen City, China |
| Capacity | |
| Frequency | |
| Power | , |
| Tank Material |
SUS304 Stainless Steel |
| Voltage |
AC 110V 60Hz;AC 220V 50Hz |
| Plug Type |
EU Plug ,US Plug ,AU Plug ,Other Plugs ,UK Plug |
| Certificates |
CE ,FCC ,ROHS |
| Warranty |
1 Year |
| Customization |
Logo/Pattern ,Private Lable ,White Label |
| Function | , , |
| Manufacturer |
Yunyisonic Shenzhen Co., Ltd. |
14-130L Industrial Ultrasonic Cleaner with Built-in Generator | Adjustable Power 28/40kHz for Engine Block Carburetor DPF Lab Cleaning
In stock
| Volumetric Weight | N/A |
|---|---|
| Package Dimensions | N/A |
| Model |
YN0614 ,YN0820 ,YN1030 ,YN1240 ,YN1860 ,YN2480 ,YN3613 |
| Application Field | , , , , , , , , , , , , , , , , , , |
| Brand |
Yunyisonic |
| Origin |
Shenzhen City, China |
| Capacity | , , , |
| Frequency | , , , |
| Power | , , , , , , |
| Tank Material |
SUS304 Stainless Steel |
| Housing Material |
SUS201 T1.0mm |
| Voltage |
AC 110V 60Hz;AC 220V 50Hz |
| Plug Type |
EU Plug ,US Plug ,AU Plug ,Other Plugs ,UK Plug |
| Certificates |
CE ,FCC ,ROHS |
| Warranty |
1 Year |
| Customization |
Logo/Pattern ,Private Lable ,White Label |
| Function | , , , , |
| Manufacturer |
Yunyisonic Shenzhen Co., Ltd. |
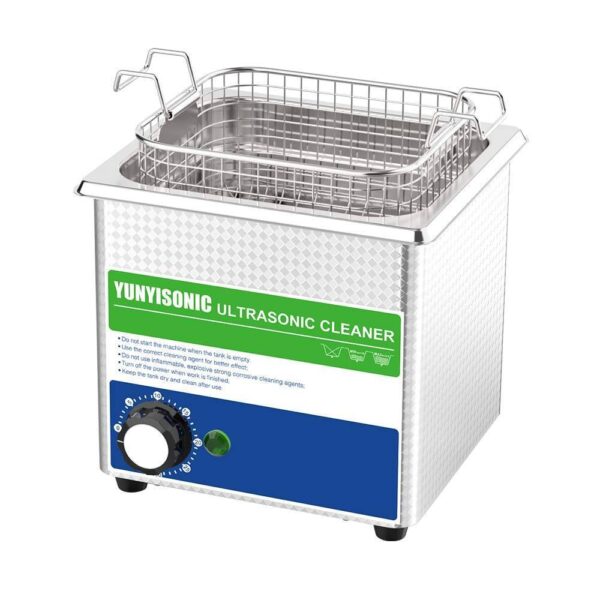
1L Smart Benchtopl Watch Ultrasonic Cleaner for Watchmakers and Household Cleaning In Bulk
In stock
| Volumetric Weight | 1.70 kg |
|---|---|
| Package Dimensions | 23.5 × 17 × 18 cm |
| Model |
YA010A ,YA010GA |
| Application Field | , , , , , , , , , , |
| Brand |
Yunyisonic |
| Origin |
Shenzhen City, China |
| Capacity | |
| Frequency | |
| Power | , |
| Tank Material |
SUS304 Stainless Steel |
| Voltage |
AC 110V 60Hz;AC 220V 50Hz |
| Plug Type |
EU Plug ,US Plug ,AU Plug ,Other Plugs ,UK Plug |
| Certificates |
CE ,FCC ,ROHS |
| Warranty |
1 Year |
| Customization |
Logo/Pattern ,Private Lable ,White Label |
| Function | |
| Manufacturer |
Yunyisonic Shenzhen Co., Ltd. |
2L Timer Dial Ultrasonic Cleaner for Jewelry Rings Watches Coins Dentures | Household Ultrasonic Cleaning Machine
In stock
| Volumetric Weight | 2.65 kg |
|---|---|
| Package Dimensions | 25.5 × 24.2 × 21.5 cm |
| Model |
YA020B ,YA020GB |
| Application Field | , , , , , , , , , , , , |
| Brand |
Yunyisonic |
| Origin |
Shenzhen City, China |
| Capacity | |
| Frequency | |
| Power | , |
| Tank Material |
SUS304 Stainless Steel |
| Voltage |
AC 110V 60Hz;AC 220V 50Hz |
| Plug Type |
EU Plug ,US Plug ,AU Plug ,Other Plugs ,UK Plug |
| Certificates |
CE ,FCC ,ROHS |
| Warranty |
1 Year |
| Customization |
Logo/Pattern ,Private Lable ,White Label |
| Function | , , |
| Manufacturer |
Yunyisonic Shenzhen Co., Ltd. |
Practical Safety and Use Tips for DIYers
If you still want to try building your own ultrasonic cleaner, take these safety and usage tips seriously:
Always test components individually before assembly.
Use protective gloves and goggles when soldering or wiring.
Never run the machine dry—always ensure the tank has liquid before powering up.
Avoid flammable cleaning liquids or homemade mixtures unless tested and proven safe.
Run short cleaning cycles first and inspect results before scaling up.
Provide adequate ventilation to avoid heat buildup or vapor accumulation.
If you’re using your device near electronics or metals sensitive to corrosion, test compatibility thoroughly.
Final Thoughts: Know Your Goal, Pick Your Path
There’s undeniable satisfaction in building your own ultrasonic cleaner. It’s a project that stretches your creativity and gives you hands-on experience with soundwave-based cleaning technology. For light applications or educational purposes, it’s a rewarding endeavor.
But when it comes to daily reliability, deep cleaning power, or cleaning delicate tools, sometimes you don’t want to build—you want to clean. And that’s when choosing a professionally engineered system like those from Yunyisonic becomes a smarter, more sustainable investment.
Yunyisonic Ultrasonic Cleaners