Ultrasonic cleaning isn’t magic—it’s a physical process rooted in fluid dynamics and acoustic engineering. At its core, ultrasonic cleaning relies on the principle of acoustic cavitation. When high-frequency sound waves—typically ranging from 20kHz to 80kHz—pass through a liquid (usually water with a cleaning solution), they create rapid cycles of high and low pressure. During the low-pressure cycles, tiny vacuum bubbles form. These bubbles grow until they violently collapse during the high-pressure cycles. This collapse generates localized micro-jets of energy, capable of dislodging even the most stubborn contaminants from surfaces, including cracks and blind holes.
What makes ultrasonic cleaning so powerful is its ability to reach areas that traditional cleaning methods cannot. Think about medical instruments with tiny internal lumens, or carburetors with complex geometries. Brushes and solvents may clean what’s visible, but only ultrasonic cavitation penetrates microscopically small recesses to remove embedded grime, oxidation, or oils.
The cleaning action is also non-abrasive, making it ideal for delicate materials like jewelry, lenses, or printed circuit boards. But for the process to work optimally, several key factors need to be perfectly aligned—from the frequency of sound waves to the type of solution used, and even the position of the item in the tank.
Understanding how each of these variables affects the cleaning process is essential to unlocking the full potential of ultrasonic cleaning.

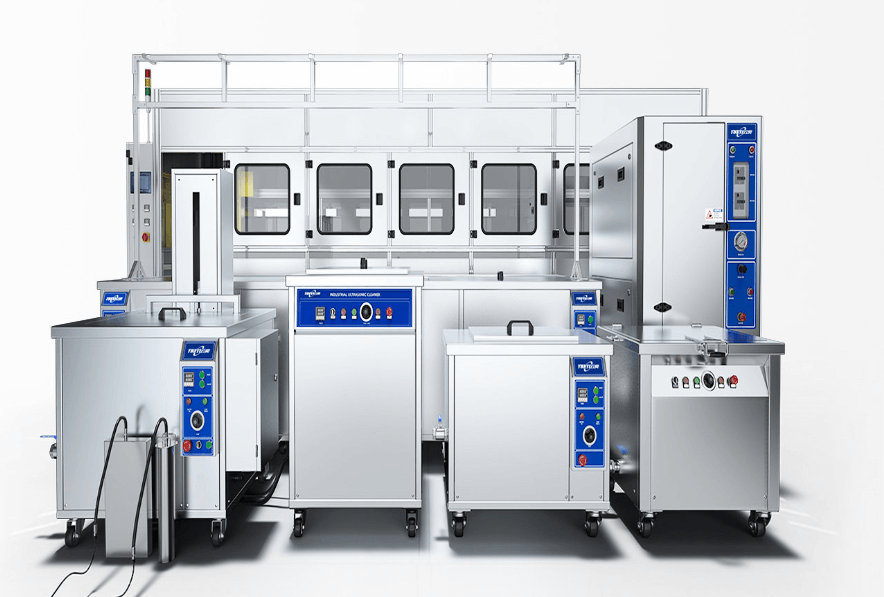
Ultrasonic cleaning machine in operation
Why Cleaning Effectiveness Varies: Overview of Influencing Factors
Ultrasonic cleaners might seem like plug-and-play devices, but the results can vary widely depending on a host of interacting conditions. A laboratory using the same machine for different experiments might see consistent success one day, then inconsistent cleaning the next—simply due to a change in frequency settings, water temperature, or the amount of contamination on parts.
Factors such as solution chemistry, cleaning duration, power density, and bath temperature all influence how efficiently contaminants are removed. Additionally, the type and geometry of the part being cleaned—its material, porosity, and surface finish—can either enhance or hinder the effect of cavitation.
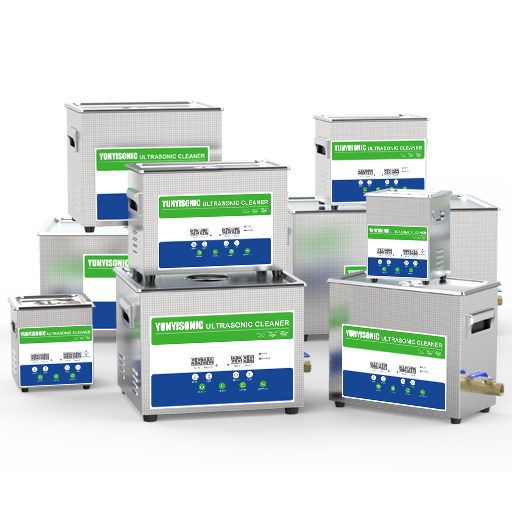
Yunyisonic ultrasonic cleaning machine
Ultrasonic Frequency and Its Impact on Cleaning Performance
Ultrasonic frequency is not a one-size-fits-all setting. It defines the size and intensity of cavitation bubbles and ultimately determines how aggressively contaminants are removed. Lower frequencies, such as 20kHz or 25kHz, produce larger bubbles that collapse with greater force. This is useful for cleaning heavy industrial parts, engine components, or items coated with carbon buildup and grease.
In contrast, higher frequencies like 40kHz, 68kHz, or even 80kHz produce smaller, gentler bubbles. These are better suited for sensitive surfaces like electronic components, medical instruments, or precision optics, where aggressive cleaning could cause damage.
Even within laboratory settings, frequency adjustments can yield vastly different outcomes. For instance, a 2021 study published in Ultrasonics Sonochemistry demonstrated that increasing the frequency from 25kHz to 68kHz significantly improved the cleaning of glassware residues without damaging calibration marks—an essential requirement in analytical chemistry labs.
Some modern ultrasonic cleaners now offer dual-frequency or multi-frequency modes, allowing users to switch between coarse and fine cleaning depending on the type of debris or sensitivity of the object.

Ultrasonic Frequency Select Guide
When selecting frequency, the key question is: Are you removing tough deposits, or preserving delicate surfaces? The right frequency ensures effective cavitation without surface degradation.
Power and Power Density: How Much Is Too Much?
While frequency determines the type of cavitation, ultrasonic power—measured in watts—controls the intensity of the process. Power alone doesn’t tell the whole story; it must be assessed relative to the volume of the cleaning tank. This is where the concept of power density comes in: the amount of power delivered per liter of solution, usually expressed in watts per liter (W/L).
Too little power density, and cavitation may be weak or inconsistent. Too much, and you risk eroding delicate surfaces, damaging the ultrasonic transducers, or overheating the solution.
For most cleaning applications, power densities in the range of 10–40 W/L are considered effective. A typical 6L ultrasonic bath with 180W output provides about 30W/L, striking a good balance between aggressive cleaning and equipment safety.
Research published in the Journal of Applied Physics supports this, showing that cavitation threshold and bubble dynamics change markedly as power increases beyond optimal levels—leading to turbulence instead of precision.
Some ultrasonic cleaners offer adjustable power, allowing users to fine-tune intensity. This is especially helpful when switching between hard materials like stainless steel and soft materials like aluminum or plastics.
Power also affects solution heating. High-power cavitation naturally warms the liquid, which can enhance cleaning but also affect solution stability. This makes it essential to monitor both power and temperature during longer cleaning cycles.
Bath Temperature: The Thermodynamic Effect on Cavitation
Temperature plays a silent yet powerful role in ultrasonic cleaning performance. While sound waves and cleaning chemistry are more visible in how they affect contaminants, the temperature of the solution directly influences the formation and collapse of cavitation bubbles.
Warmer liquids reduce surface tension and viscosity, allowing cavitation bubbles to form more easily and collapse more uniformly. As a result, contaminants are dislodged more efficiently. In many ultrasonic cleaning tasks—whether in medical equipment maintenance or precision tool degreasing—a moderate increase in temperature can boost cleaning speed and consistency.
However, there’s a delicate balance. When temperature rises too high, cavitation effectiveness begins to drop. This is because as the liquid nears its boiling point, the formation of stable cavitation bubbles becomes erratic. Instead of clean implosions, bubbles may simply expand without delivering the energy needed to remove particles. In essence, heat helps—but only up to a point.
For most water-based ultrasonic cleaning applications, the optimal range is between 30°C to 60°C (86°F to 140°F). For example:
- Jewelry and electronics: 30°C–40°C
- Automotive parts and tools: 45°C–60°C
- Laboratory glassware: 40°C–50°C
It’s important to note that specific chemicals react differently to heat. Alkaline solutions for removing organic residues may work better at 50°C, while acidic descalers for mineral deposits can become unstable above 60°C. This is why many ultrasonic cleaners come with thermostats and digital displays—to help maintain precise thermal conditions.
A study in Analytica Chimica Acta noted that even slight variations of ±5°C affected the efficiency of ultrasonic removal of protein-based contaminants in biomedical tools. This emphasizes that temperature control isn’t just beneficial—it’s critical.
Cleaning Time: Striking the Right Balance
It’s a common misconception that “longer is better” when it comes to ultrasonic cleaning time. In reality, the cleaning process reaches a point of diminishing returns. Once the majority of accessible contaminants are removed, extended exposure does little to enhance cleanliness—and in some cases, it may even damage sensitive surfaces.
The right cleaning time depends on several variables: the type of object, the nature of the contamination, the frequency and power being used, and the temperature of the bath. For instance, lightly soiled surgical tools may require only 5–10 minutes, while carbon-caked automotive injectors might benefit from 20–30 minutes of treatment.
Research has shown that cavitation intensity tends to plateau after an initial burst of activity, with most of the cleaning action happening in the first third of the total cycle. After that, debris floats in suspension or settles in the tank. Without proper filtration or flushing, recontamination may occur.
Moreover, prolonged exposure to ultrasonic vibrations can weaken adhesives, soften plastics, or gradually abrade surfaces, especially at higher temperatures. For precision cleaning in the electronics or aerospace sectors, even minor surface changes can render a part unusable.
That’s why many equipment providers offer application-specific cleaning time guidelines. It’s also common practice to recommend the use of timers and automatic shutoff features to prevent overcleaning and potential damage to sensitive items.
A well-documented method to optimize time is the staggered inspection approach: run the cleaner for a short interval, check the object, and repeat if needed. This reduces unnecessary ultrasonic stress while ensuring complete cleaning.
Cleaning Solution Composition and Chemistry
Even the most advanced ultrasonic cleaner won’t perform well with plain tap water. The chemistry of the cleaning solution is just as critical as frequency or power. Cleaning solutions typically contain a mix of surfactants, detergents, corrosion inhibitors, and pH modifiers—each tailored to specific cleaning goals.
Here’s why chemistry matters: cavitation alone dislodges particles, but chemical action breaks down, emulsifies, or chelates the residue so it can be flushed away. For example:
- Alkaline cleaners (pH > 9): Ideal for organic residues like grease, oil, or proteins. Common in industrial and medical applications.
- Acidic cleaners (pH < 5): Suitable for removing mineral scale, rust, and oxidation from metals.
- Neutral pH solutions (pH 6–8): Used for delicate items like jewelry, lenses, or plastics where corrosion risk is high.
The solution must also be compatible with the item material. Aluminum, for example, can be etched or pitted by strong alkaline or acidic solutions if not properly buffered. Likewise, ammonia-based solutions, while effective at cutting grease, can damage gold-plated surfaces or delicate plastics.
Experts at the American Society for Testing and Materials (ASTM) emphasize the importance of cleaning solution validation, especially in regulated environments like pharmaceuticals or semiconductor manufacturing. Regular replacement, filtration, and pH monitoring are essential to maintain consistent performance.
Furthermore, homemade solutions or dish detergents should be avoided, as they often create excess foam, interfere with cavitation, or corrode the tank over time.

Tank Size and Object Positioning
While often overlooked, the size of the ultrasonic tank and the way objects are positioned inside it can dramatically affect cleaning outcomes. The reason lies in the propagation of sound waves and the formation of cavitation fields.
Ultrasonic energy disperses in waves from the transducers mounted on the bottom or side of the tank. If an object is placed directly on the tank floor, it not only blocks wave travel but also risks damaging both the object and the transducer. Cavitation bubbles need room to form and collapse properly. This is why nearly all professional systems recommend using suspension trays or baskets to float items above the tank base—typically by at least 1–2 inches.
Moreover, the size of the tank relative to the item matters. If the tank is too small, wave reflections from the walls can create standing waves and “dead zones” where cavitation is weak or non-existent. On the other hand, using an oversized tank for a very small item can waste energy and lead to inconsistent results unless the power density is properly adjusted.
Another critical consideration is load distribution. If multiple items are being cleaned simultaneously, they must be spaced apart to prevent shadowing—where one object blocks ultrasonic waves from reaching another. Parts should never be stacked or touching, especially if they have internal cavities or threaded components. Entrapped air in such regions can shield the surface from cavitation altogether.
Many manufacturers provide tank design guidelines to help minimize these issues, often recommending square or rectangular tanks with rounded corners to reduce wave interference and ensure a more uniform distribution of ultrasonic energy. Some advanced systems also incorporate multi-directional transducer arrays to create consistent cavitation throughout the cleaning chamber.
Lastly, objects with complicated geometries may require manual rotation or repositioning during the cleaning cycle to ensure thorough exposure. In laboratory or aerospace settings, automatic rotating baskets are sometimes employed for this reason.
Degassing the Solution Before Cleaning
When a cleaning solution is first added to an ultrasonic tank, it often contains dissolved gases—oxygen, nitrogen, and carbon dioxide—that inhibit proper cavitation. These gases occupy bubble nuclei and dampen the implosive power of ultrasonic energy. If not removed, cavitation is reduced in strength, and cleaning efficiency suffers.
Degassing is the process of removing these trapped gases from the solution before placing objects inside the bath. It’s typically done by running the ultrasonic cleaner without any items for 5–15 minutes, depending on tank size, frequency, and fluid viscosity. Some units include a dedicated “degas” mode that uses pulsed ultrasonic bursts to accelerate the process.
This step is especially important when using freshly mixed solutions, high-viscosity fluids, or operating at lower frequencies (20–28kHz), where degassing takes longer. Skipping degassing may result in inconsistent cleaning—visible as patches of residue or dirt left behind.
Research from the Journal of Materials Processing Technology confirms that proper degassing increases cavitation intensity by over 20% in controlled tests, particularly for non-aqueous solvents.
Once degassed, the solution retains its low-gas state for several hours, but agitation, heat, or the introduction of new objects may reintroduce gases. For multi-batch cleaning, periodic degassing may be necessary.
Sweep Frequency and Modulation Techniques
Ultrasonic sweep is a feature in many advanced cleaners that subtly modulates the frequency—often by ±1 to 3 kHz—around the machine’s central setting. Instead of a constant 40kHz, for instance, the unit might oscillate between 38kHz and 42kHz several times per second.
Why is this helpful? Fixed-frequency waves can lead to the formation of stationary wave patterns, resulting in zones of strong and weak cavitation—much like a ripple in water that remains stuck in one spot. These dead zones can lead to inconsistent cleaning, especially in precision applications like surgical instruments or microelectronic assemblies.
By slightly sweeping the frequency, the sound field inside the tank becomes dynamic, eliminating standing waves and ensuring a more uniform distribution of cavitation energy. The result is better surface coverage, improved debris removal, and reduced risk of surface etching.
A 2020 comparative study published in Ultrasonics confirmed that sweep frequency cleaning consistently delivered 10–18% higher cleaning efficiency across various sample geometries, especially in parts with crevices or capillary tubes.
Additionally, sweep mode reduces the shrill audible “whine” that some fixed-frequency units emit, making them quieter and more comfortable for operators.
Material Type and Geometry of the Item
The object being cleaned isn’t passive—it actively interacts with the ultrasonic process. Different materials absorb or reflect sound energy in unique ways. Dense, hard surfaces like stainless steel reflect cavitation better, allowing more cleaning energy to accumulate around the item. Softer materials like rubber or certain plastics may absorb energy, dampening the effect.
In addition, objects with intricate geometries—threads, holes, curves, or layered construction—introduce acoustic barriers and turbulence. Air pockets trapped in blind holes or seams can prevent solution contact and limit cavitation. Even surface finish matters: highly polished surfaces allow easier bubble formation, while rough surfaces can trap debris that resists removal.
Here’s an example: cleaning a flat glass microscope slide takes far less time than cleaning a dental drill with narrow lumens and micro-threads. The latter may need orientation changes during cleaning or even post-clean rinsing.
In applications like aerospace or biomedical device manufacturing, finite element modeling (FEM) is sometimes used to simulate how ultrasonic waves interact with a given part, optimizing tank design and cleaning time before implementation.
Contaminant Type and Bonding Strength
Not all dirt is created equal. In ultrasonic cleaning, the type of contaminant and how strongly it adheres to the object’s surface have a profound impact on the cleaning strategy and the ultimate result. Understanding the nature of what you’re trying to remove is essential in selecting the right frequency, power, solution chemistry, and cleaning duration.
Let’s start with organic contaminants—oils, greases, fingerprints, and biological materials. These tend to respond well to alkaline cleaning solutions and mid-frequency ultrasonic energy (35kHz–45kHz). The cavitation bubbles help emulsify the grease, while the surfactants in the cleaning fluid break the bonds and lift the particles from the surface.
Inorganic contaminants like scale, rust, or oxidized metal layers are tougher. Rust, for instance, can chemically bond with the base metal, requiring acidic solutions or even specialty chelating agents to break the bond. These cleaning agents are typically used in combination with lower-frequency, high-energy cavitation (20kHz–28kHz) to dislodge the firmly attached residues.
Then there are composite contaminants—for example, in automotive parts or surgical instruments—where both organic and inorganic layers accumulate. In such cases, a staged cleaning approach may be best: starting with an alkaline degreaser to remove oil, followed by an acidic rinse to dissolve mineral buildup.
The strength of adhesion also plays a critical role. A dried protein layer or baked-on lubricant may require longer cleaning cycles, pre-soaking, or even temperature cycling. On the other hand, loosely adhered dust or pollen can be removed in under a minute with gentle high-frequency cavitation.
A publication by the Institute of Physics showed that ultrasonic cleaning of surgical stainless steel tools contaminated with dried blood was significantly improved by pre-warming the sample and applying a detergent with enzymatic activity, reducing cleaning time by nearly half.
Water Quality and Impurities
The quality of water used in ultrasonic cleaning often goes unnoticed, but it can significantly affect both cleaning performance and the longevity of the equipment. Tap water contains minerals, chlorine, and dissolved solids that interfere with cavitation and may even damage sensitive components or the tank liner over time.
Hard water—rich in calcium and magnesium—can reduce the effectiveness of detergents and cause white mineral deposits on cleaned items. In high-precision industries such as optics or semiconductor fabrication, such deposits are unacceptable.
To avoid these problems, many users opt for deionized (DI) or distilled water, especially when working with electronics, circuit boards, or medical devices. DI water has had its ions removed, allowing it to cavitate more uniformly and clean more effectively. It also reduces spotting and residue after drying.
However, there’s a tradeoff. DI water is more aggressive on certain metals, especially aluminum and copper, because it lacks the buffering capacity of mineral-rich water. For this reason, corrosion inhibitors or neutral-pH additives are often used when cleaning soft metals in DI baths.
In industrial environments, closed-loop water filtration systems may be used in ultrasonic cleaning lines to maintain water purity. These systems filter out debris, neutralize pH, and sometimes reionize water to prevent corrosion. Without such systems, changing the bath water regularly—typically after every 5–10 cleaning cycles—is a best practice.
A study by the Journal of Cleaning Science and Technology found that using filtered or distilled water increased contaminant removal by up to 30% compared to unfiltered tap water, particularly in electronics and optical cleaning applications.
Maintenance and Calibration of Ultrasonic Equipment
Even with all parameters set correctly, an ultrasonic cleaner will underperform if it’s not properly maintained. Just like any precision tool, these machines require regular inspection, cleaning, and calibration to ensure consistent operation.
One of the most common problems is transducer wear or failure. Over time, the piezoelectric or magnetostrictive transducers that generate ultrasonic waves can degrade. This leads to a reduction in cavitation intensity, resulting in incomplete cleaning, especially in tanks with no sweep frequency or power feedback system.
To detect such issues, foil tests are often used. A piece of aluminum foil is submerged in the bath and subjected to ultrasonic cavitation. Uniform perforation or pitting of the foil indicates a healthy system. If large sections remain untouched, it may signal a dead zone or weak transducer.
Other critical maintenance tasks include:
- Draining and cleaning the tank after each use to prevent sludge buildup and microbial growth
- Checking solution levels regularly, as evaporation alters cavitation behavior
- Descaling the tank interior if using hard water or acidic solutions
- Inspecting basket and tray alignment, which affects object positioning
Digital models may require software updates or recalibration using internal diagnostics or external calibration devices. Some units include self-check systems that log usage hours and suggest service intervals automatically.
The Clean Equipment Maintenance Association (CEMA) recommends quarterly inspections and annual full-system calibration for ultrasonic equipment used in regulated industries like pharma and aerospace.
Case Studies and Real-World Use Examples
Understanding ultrasonic cleaning factors in theory is one thing—but real-world performance brings those factors into focus.
Case 1: Aerospace component degreasing
A European aerospace firm using titanium turbine blades found that residues remained after cleaning at 40kHz for 15 minutes. After adjusting the frequency to 25kHz and increasing bath temperature from 35°C to 50°C with an alkaline cleaner, residue removal improved by 67%, and cycle time was reduced by 5 minutes.
Case 2: Jewelry cleaning in a retail setting
A chain of jewelry stores observed cloudiness on polished gold items after cleaning. Investigation revealed the tap water in several locations had high hardness. Switching to DI water with a neutral-pH cleaner and adding post-clean rinsing eliminated the problem and reduced returns.
Case 3: Medical tool sterilization prep
A hospital’s central sterile department saw inconsistent cleaning of orthopedic surgical tools. After testing, they found insufficient degassing and poor item spacing. Implementing 10-minute degas cycles and redesigning trays to allow for more spacing improved results by 80% according to ATP swab tests.
These examples underscore a key message: small adjustments in ultrasonic cleaning parameters can lead to dramatic improvements, or unexpected failures, depending on how they’re managed.
Misconceptions That Lead to Poor Cleaning Results
Ultrasonic cleaning is often mistaken for a fully automatic process—simply fill the tank, press start, and walk away. But this misconception leads to many of the most frequent and damaging errors in both industrial and laboratory settings. These mistakes not only reduce cleaning effectiveness, but also shorten equipment lifespan and increase the risk of damaging sensitive items.
A common myth is that more detergent means more cleaning power. In truth, using excessive detergent can create foam, which interferes with cavitation. Since ultrasonic cleaning relies on the formation and collapse of microscopic bubbles, any disruption to fluid dynamics—such as surface foam or high surfactant concentrations—can reduce energy transfer and diminish cleaning results. Recommended solution concentrations typically range from 1% to 5%, depending on the specific cleaning task and material being treated.
Another widespread mistake involves overloading the tank. Placing too many items in the bath—or stacking them too closely—can block ultrasonic waves from reaching all surfaces. When items touch or overlap, a phenomenon known as shadowing occurs, where cavitation fails to reach internal or recessed areas. This is especially problematic in applications requiring absolute cleanliness, such as electronics assembly or surgical instrument preparation.
Neglecting to change the cleaning solution regularly is also a common source of poor performance. Even when the solution appears visually clean, it may be saturated with oils, particles, or dissolved residues that impair cavitation and cleaning chemistry. For consistent results, it’s recommended to replace the solution after several cleaning cycles, particularly in critical applications like medical device preparation, food production, or precision optics.
Lastly, skipping the degassing and warm-up steps is a critical oversight. Freshly filled tanks contain dissolved gases that weaken cavitation. Likewise, if the solution hasn’t reached its target temperature, cleaning performance suffers. Rushing into the cleaning cycle too early often leads users to believe the equipment is underperforming—when in fact, the problem lies in the setup, not the machine.
Operational reviews from multiple industries have consistently shown that human error is one of the leading causes of ultrasonic cleaning failure, far more than mechanical faults. A disciplined approach—grounded in proper setup, correct chemical dosing, and attention to equipment limitations—is key to unlocking the full potential of ultrasonic cleaning.
Advancements in Ultrasonic Cleaning Technology
The evolution of ultrasonic cleaning has accelerated in recent years, with innovations focused on automation, digital control, and real-time monitoring. These advancements aim to eliminate guesswork and ensure repeatable, high-quality results across diverse industries.
One major shift has been the adoption of multi-frequency systems. These cleaners offer dual or even triple frequency operation in a single unit. For example, a system might allow cleaning at 25kHz for heavy-duty applications and then switch to 80kHz for delicate electronics. This versatility makes them especially valuable in multi-department facilities or contract manufacturing environments.
Digital power modulation is another enhancement. Instead of delivering constant ultrasonic energy, advanced systems now offer pulsed or ramped power. This prevents overheating, reduces micro-damage to fragile items, and conserves energy. Some units use real-time load detection to automatically adjust power and frequency based on the tank contents.
Further, touchscreen interfaces and programmable cleaning cycles have made ultrasonic machines smarter and more user-friendly. Operators can now store specific profiles for different parts or materials, including frequency, temperature, duration, and chemical formulation. This minimizes human error and standardizes results across shifts or locations.
Perhaps the most futuristic innovation is the integration of Internet of Things (IoT) monitoring. High-end industrial ultrasonic cleaners can now be connected to cloud-based dashboards where maintenance schedules, cleaning logs, tank health, and even water quality can be tracked remotely. Some models alert operators when the solution needs to be changed or when transducer performance drops below acceptable levels.
Advanced ultrasonic cleaning technologies are increasingly being adopted in high-stakes sectors such as medical sterilization, semiconductor manufacturing, and aerospace component maintenance—where consistent performance and zero failure are non-negotiable.
Expert Recommendations and Best Practice Guidelines
Given the number of variables that influence ultrasonic cleaning effectiveness, it’s no surprise that experts across industries emphasize the importance of following detailed usage protocols. Overlooking these recommendations can lead to inconsistent cleaning results, damage to sensitive components, or even safety compliance failures.
Experts advise that ultrasonic frequency and power settings should always be chosen based on the nature of the contaminant and the material composition of the item being cleaned. Operating outside the optimal solution temperature range, for example, can drastically reduce cavitation efficiency and may degrade certain materials or compromise sensitive coatings.
Many facilities rely on application-specific matrices to determine the ideal combination of cleaning solution, cycle duration, and bath temperature for materials such as stainless steel, titanium, glass, rubber, and engineered polymers. These tools help standardize procedures across cleaning stations and ensure repeatable, high-quality results.
In regulated environments—such as pharmaceutical production, aerospace manufacturing, or medical device sterilization—formal validation procedures are often required. These may include foil testing to evaluate cavitation uniformity, as well as post-clean inspections like protein residue tests, UV light examination, or gravimetric residue measurements to confirm cleanliness levels.
Proper operator training is another cornerstone of success. Cleaning protocols must be adjusted depending on the items involved; a method suitable for degreasing steel tools, for instance, may be too aggressive for anodized aluminum or optical components. Untrained personnel may overlook critical steps such as degassing, load spacing, or solution compatibility—leading to ineffective cleaning or material degradation.
Ultimately, achieving consistently high cleaning standards with ultrasonic equipment requires a combination of technical knowledge, procedural discipline, and careful material matching. Relying on validated guidelines and routine testing ensures not only optimal results, but also equipment longevity and regulatory compliance.
Environmental Conditions and Operating Environment
Although the ultrasonic process takes place inside a sealed tank, external environmental factors can still influence cleaning results, particularly in high-precision or industrial setups.
Ambient room temperature can affect solution temperature stability. In hot environments, ultrasonic baths may heat up faster than intended, shortening cleaning cycles or accelerating evaporation. Cold environments, on the other hand, may prevent the solution from reaching optimal cavitation temperatures without additional heating.
Vibration and floor stability can also matter—particularly in lab settings. Some delicate ultrasonic systems are sensitive to mechanical vibrations from nearby equipment (like centrifuges or HVAC systems), which can cause fluctuations in wave formation or introduce harmonics that alter cavitation behavior.
Humidity and dust levels are especially relevant when cleaning sensitive electronic components. If the cleaned items are not dried immediately in a controlled environment, they may reabsorb moisture or particulates, defeating the purpose of the cleaning process.
In industrial settings, ventilation becomes crucial. Vapors from heated solutions—especially acidic or solvent-based ones—can be hazardous if inhaled. Many ultrasonic cleaning systems are paired with fume hoods, exhaust systems, or sealed enclosures to protect workers and equipment.
Overall, the environment surrounding the ultrasonic tank should be clean, temperature-controlled, vibration-free, and well-ventilated—particularly when cleaning critical items for aerospace, medical, or laboratory use.
Final Thoughts on Optimizing Ultrasonic Cleaning Results
Ultrasonic cleaning offers remarkable advantages—speed, precision, and the ability to reach into places other cleaning methods can’t. But its effectiveness isn’t guaranteed by the machine alone. It’s the synergy of frequency, power, temperature, time, solution chemistry, object positioning, and operator awareness that unlocks its full potential.
Understanding how each factor interacts allows for customized cleaning protocols that are both repeatable and reliable. Whether you’re cleaning semiconductor wafers, surgical tools, automotive components, or antique jewelry, a disciplined, science-based approach ensures superior results.
Ultrasonic technology continues to evolve. With smart diagnostics, multi-frequency modes, and real-time performance tracking, today’s cleaners are not just machines—they’re precision instruments. But even the best machine can underperform if fundamental variables are ignored.
By mastering the variables that govern ultrasonic cleaning, users can transform an ordinary cleaning process into an optimized, validated, and high-performance operation—backed by science, refined through practice, and validated through results.