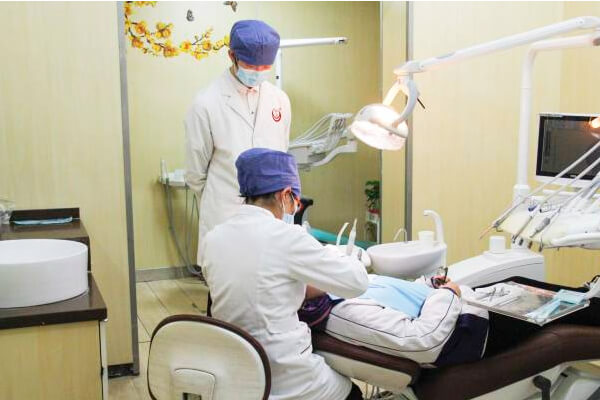
1. Challenges in Cleaning Dental Instruments
Dental instruments such as handpieces, scalers, forceps, probes, and elevators are typically small, intricate, and feature multiple hinges, joints, or narrow gaps. During procedures, these tools come into contact with blood, saliva, gingival fluid, and tissue debris. If not thoroughly cleaned:
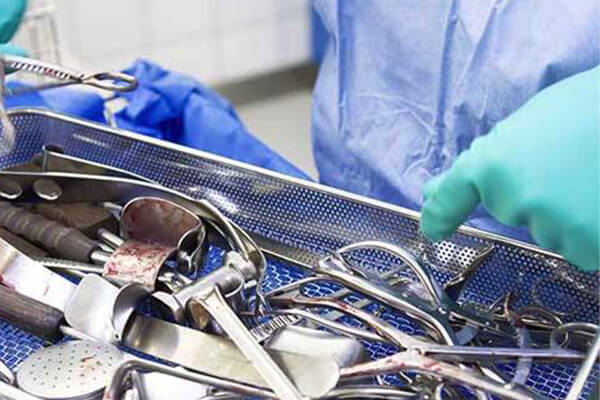
Dental instruments
- Protein and biofilm residues may remain hidden in blind holes or hinge mechanisms.
- Incomplete cleaning compromises the effectiveness of autoclaving and sterilization.
- Corrosion and rust can form over time, degrading instrument integrity.
- Residual detergent or debris can interfere with sterilization and pose safety risks.
- Tools made of composite materials or plastic components may warp or degrade if exposed to excessive heat during drying or sterilization, making pre-cleaning essential.
Dental instruments are often small, intricately designed, and used in highly contaminated environments, making them especially difficult to clean effectively. Their complex shapes—featuring hinges, serrations, and narrow lumens—pose a major challenge for manual cleaning methods. These challenges highlight why manual brushing alone is insufficient and often inconsistent.
Without a highly penetrative, non-damaging cleaning method like ultrasonic technology, instruments are at risk of incomplete cleaning, which can compromise both patient safety and regulatory compliance.
2. Why Ultrasonic Cleaning Is Ideal for Dentistry
Ultrasonic cleaning machines generate high-frequency sound waves that create microscopic bubbles in a liquid solution. These bubbles implode rapidly—a process called cavitation—releasing bursts of energy that dislodge and dissolve contaminants, even from hard-to-reach areas.
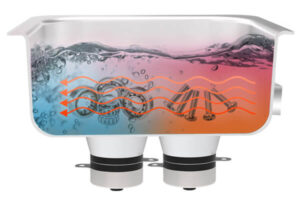
Ultrasonic cleaning machine in operation
Key advantages in dental applications include:
Ultrasonic cleaning machines provide professional and efficient cleaning solutions for dental treatment, which not only improves the safety of instrument reuse, but also greatly reduces the burden of manual cleaning.
- Comprehensive cleaning: Reaches into small joints, grooves, and internal surfaces without disassembly.
- Non-damaging: Gentle on instrument surfaces; does not scratch or degrade high-precision tools.
- Effective on complex contaminants: Efficiently removes proteins, blood, and tissue residues.
- Material compatibility: Safe for stainless steel, alloy, ceramic, and resin-based tools.
- Enhanced with enzymatic detergents: Improves cleaning power while preserving instrument quality.
3. Recommended Ultrasonic Cleaning Workflow for Dental Tools
To ensure optimal cleaning results and extend the life of dental instruments, a structured, step-by-step ultrasonic cleaning process should be followed. This approach not only improves hygiene but also aligns with clinical best practices and infection control standards.
(1) Initial Rinse
Immediately after use, instruments should be rinsed under running lukewarm water to remove gross contamination like blood, tissue, or dental cement. The sooner this is done, the easier it is to prevent protein coagulation or residue hardening.
Tip: Use a soft nylon brush to gently clean around hinges, serrated edges, and jointed components. Avoid metal brushes that may scratch delicate surfaces.
(2) Preparing the Ultrasonic Bath
Fill the ultrasonic tank with fresh, clean water and add an enzymatic or neutral pH cleaning solution specifically designed for medical or dental use.
- Solution type: Enzymatic cleaners break down organic material such as proteins and blood; neutral cleaners help protect delicate coatings.
- Dilution: Follow the manufacturer’s instructions (typically 1:128 ratio). Using overly concentrated solutions can damage instruments.
- Temperature: Maintain between 15°C and 30°C; do not exceed 45°C, as excessive heat may denature enzymes or damage plastic components.
(3) Loading the Instruments
Place instruments into a stainless steel mesh basket or instrument tray. Do not stack or overcrowd tools, as this may hinder the cavitation process.
- Keep hinged instruments open during cleaning to allow solution penetration.
- Never place instruments directly on the tank bottom—this can reduce ultrasonic efficiency and damage transducers.
- If cleaning multiple sets, separate sharp items (e.g., explorers, scalers) from delicate ones to prevent contact damage.
(4) Ultrasonic Cleaning Process
Close the lid to minimize aerosol dispersion. Activate the ultrasonic cycle and select settings based on load type:
- Cleaning time: Typically 3–10 minutes depending on the level of contamination.
- Degas function: Use this feature first (if available) to eliminate air pockets and enhance cleaning efficiency.
- Sweep frequency: Helps reduce standing waves and ensures uniform cleaning across the tank.
- Heated mode: If applicable, turn on heating 5–10 minutes before cleaning for better cleaning power—but ensure it doesn’t exceed safe limits.
Pro tip: Observe the cavitation effect—fine bubbles should appear throughout the tank. Cloudy or uneven bubbling could indicate a cleaning blind spot or need for maintenance.
(5) Thorough Post-Rinse
After the cycle, instruments must be rinsed under running deionized or filtered water to remove detergent and loosened debris. Leftover residues can interfere with sterilization or damage instruments over time.
- Pay special attention to hinges, grooves, and lumens—use a syringe or high-pressure water jet if needed.
(6) Optional Alcohol Bath
Brief immersion (1–2 minutes) in 75% isopropyl or ethyl alcohol helps:
- Eliminate residual microorganisms
- Displace water from crevices and prevent spotting or corrosion
- Accelerate drying time, especially for complex instruments
(7) Drying and Storage
Dry instruments using a medical-grade drying cabinet, compressed air gun, or lint-free cloth.
- Avoid high heat that may damage bonded tips or plastic handles.
- Once dry, inspect all tools for damage or debris.
- Store in sterilization pouches or trays for autoclaving, or keep sealed if ready for use.
Reminder: Change the cleaning solution daily, or more frequently if visibly soiled, to maintain cleaning effectiveness and prevent cross-contamination.
4. Equipment Features and Best Practices
When selecting an ultrasonic cleaner for dental use, consider equipment that includes:
- Specialized design for small dental tools
- Temperature control and timer for adjustable cleaning cycles
- Low-noise operation to suit clinical environments
- Degassing and heating functions for improved cleaning efficiency
- Compatible accessories, such as replaceable baskets and vibration-dampening pads
Best practices include:
- Never run the unit dry—always ensure liquid is present before switching on.
- Change cleaning solution daily to maintain enzymatic activity.
- Regularly clean the tank and filter mesh to prevent protein buildup.
- Dry metal tools immediately after rinsing to prevent corrosion.
5. The Role of Ultrasonic Cleaning in Safer Dental Practice
Ultrasonic cleaning technology has transformed the way dental tools are cleaned and maintained. It eliminates the risks associated with manual cleaning while significantly improving cleanliness, efficiency, and staff safety. Especially in clinics with high patient turnover, ultrasonic cleaners:
- Reduce manual workload and cleaning time
- Improve sterilization outcomes by ensuring instruments are debris-free
- Extend tool life by avoiding wear from brushing or harsh chemicals
- Enhance regulatory compliance with standards such as CDC, ISO, and ADA guidelines
Final Note: Clean Instruments, Confident Care
In dental practice, every instrument must be clean—not just visibly, but microscopically. Ultrasonic cleaners play a critical role in achieving this, offering a safe, effective, and scientifically proven method of decontamination. They are not just cleaning devices, but essential tools for ensuring patient safety, protecting clinical staff, and maintaining a professional standard of care.

Yunyisonic ultrasonic cleaning machine
Choosing the right ultrasonic cleaning solution, paired with proper technique, allows clinics to improve both workflow efficiency and hygiene standards. For practices aiming for excellence in infection control, ultrasonic cleaning is no longer optional—it’s essential.
Yunyisonic ultrasonic cleaning machines offer significant advantages in the dental field by providing thorough, non-damaging, and highly efficient cleaning for a wide range of dental instruments. Designed to meet the strict hygiene standards of modern dental clinics, Yunyisonic systems utilize advanced cavitation technology to effectively remove blood, saliva, tissue residue, and biofilm from even the most intricate instruments—such as handpieces, scalers, forceps, and endodontic files. With features like precise temperature control, adjustable cleaning cycles, and optional degassing and heating functions, Yunyisonic machines help ensure optimal pre-sterilization cleaning while extending instrument lifespan. Their quiet operation, durable stainless steel construction, and compatibility with enzymatic solutions make them a trusted choice for dental professionals seeking safer, faster, and more consistent instrument hygiene.