How to Make Safe and Effective Ultrasonic Cleaner Solutions at Home
We all appreciate what ultrasonic cleaners can do—whether it’s reviving jewelry, degreasing tools, or sanitizing dental instruments, these machines are remarkably versatile. But when it comes to what you put inside the tank, there’s always that looming question: do I really need to buy commercial cleaning fluids every time? For many users, especially those tackling lighter tasks or working with simple materials, the answer is no. With the right knowledge, homemade cleaning solutions can be both effective and cost-friendly.
Understanding What Ultrasonic Cleaners Actually Need
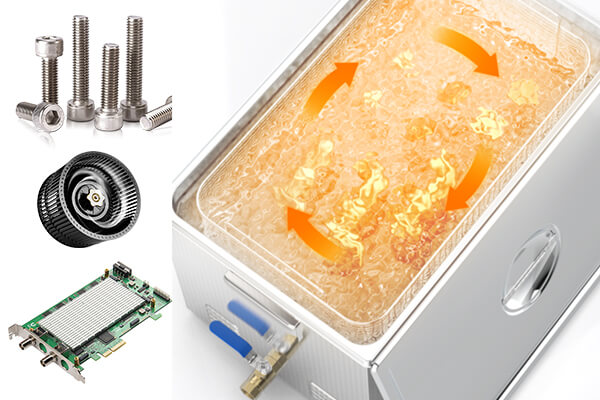
Ultrasonic cleaning machine at work
At their core, ultrasonic cleaners rely on one powerful principle: cavitation. When high-frequency sound waves pass through a liquid, they create thousands of microscopic bubbles that collapse with force, scrubbing surfaces at a scale far smaller than a toothbrush or sponge could ever reach. But here’s the often-overlooked truth: this process doesn’t work well in just any liquid.
Plain water can transmit ultrasonic energy, but it’s far from ideal. The best cleaning results come from solutions that are engineered—or carefully crafted—to assist in breaking surface tension, loosening particles, and suspending debris in the bath. This means you need ingredients that help cavitation do its job, not block it.
Surfactants, for example, reduce the surface tension of water, allowing bubbles to form more easily and collapse with greater intensity. Mild alkalines or weak acids can help dissolve oils or oxidized grime, but they must be balanced to avoid damaging the parts being cleaned—or the cleaner itself. Foaming agents, highly viscous liquids, or ingredients with strong corrosives will impair ultrasonic transmission or damage the unit over time.
In short, ultrasonic cleaners need more than sound—they need synergy. The cleaning fluid must work with the machine’s frequency, heat level, and materials in the tank. When everything aligns, you’ll get astonishing results; when it doesn’t, all you’re doing is making waves—literally, but not effectively.
Simple and Safe DIY Formulas That Actually Work
For light to moderate cleaning tasks, especially around the house or in personal hobby setups, there are several effective homemade options.
The most popular base formula includes warm distilled water, a mild degreaser like dish soap, and a small amount of white vinegar. The dish soap provides surfactants to lower surface tension, making the cavitation process more effective, while vinegar adds acidity to tackle light mineral build-up and grease.
Another popular blend includes a mix of baking soda and a drop of mild detergent. This is especially good for removing tarnish from silver or mild oxidation from metals. Just be cautious when using anything mildly abrasive—always dissolve powders completely to avoid residue on your items.
For glassware, lenses, or electronics-free components, isopropyl alcohol (diluted at 70% or lower) can be used, although it should be added in well-ventilated areas and never heated, as alcohol is flammable.
What You Should Never Add to a Homemade Solution
Just because something is a household cleaner doesn’t mean it belongs in your ultrasonic tank. Avoid bleach, ammonia, acetone, or highly acidic drain cleaners at all costs. These can corrode metals, release toxic fumes when agitated ultrasonically, or damage your machine’s inner lining.
You also want to avoid any solution that foams excessively. Foam dampens the ultrasonic waves and reduces cavitation strength, making the cleaning far less effective. If your tank starts bubbling up like a bubble bath, it’s a sign your solution needs to be adjusted.
Tailoring Solutions to What You’re Cleaning
Not all objects are created equal. Jewelry with gemstones, especially porous stones like turquoise or opal, requires a much gentler touch. A homemade solution of just distilled water and a few drops of mild detergent is often all you need.
For metal tools or automotive parts, a bit more bite may be required. Try a combination of warm water, dish soap, and a teaspoon of baking soda or citric acid per liter, especially when dealing with light rust or grease.
Plastic items, on the other hand, can warp or become hazy with too strong a formula or too high a temperature. Stick with very mild solutions and short cleaning times for these.


Keeping Your Ultrasonic Cleaner Happy
Treat your ultrasonic cleaner like you would a precision tool—it needs attention and regular care. One common mistake is assuming that once the cleaning is done, the tank can be left as is. In reality, dirty solution—especially one containing oils, metal particles, or cleaning agents—can degrade the tank lining over time, reduce cleaning efficiency, and even damage the transducers if allowed to build up.
After every few uses, empty the tank, gently wipe it down with a non-abrasive cloth, and inspect the bottom for sediment. If you’re using a homemade solution that includes baking soda or acidic agents, make sure they’re completely dissolved beforehand, and always rinse the tank well after use. Remember: even the best cleaning formula can leave behind residues that affect future cleaning cycles or corrode sensitive components of your machine.
Also, keep an eye on the heating element. Heating can accelerate chemical reactions, so using the heater unnecessarily (especially with alcohol or acidic blends) can reduce both the lifespan of the cleaner and the safety of the workspace. Use heat only when you know your materials and solution can handle it safely.
When to Stick with Commercial Solutions
There are situations where going DIY simply isn’t worth the risk. Cleaning surgical tools, electronics, antique firearms, or lab equipment? These all demand precision-grade cleaning and often require fluid certifications for safety or legal compliance. Homemade formulas might be cost-effective, but they rarely offer the stability or pH consistency necessary for such delicate tasks.
Commercial ultrasonic cleaning solutions are engineered with specific use-cases in mind—removing carbon from engine parts, sanitizing medical instruments, or degreasing optical components. They’re tested for compatibility with sensitive metals and polymers and often contain corrosion inhibitors, defoamers, and biodegradable additives that DIY blends can’t easily replicate.
Think of it this way: just as you wouldn’t use kitchen knives in place of surgical scalpels, your cleaning solution needs to match the demands of your job. If the stakes are high or the surfaces are sensitive, trusted professional fluids are worth the investment.
Final Thoughts: Smart Cleaning Starts with Smart Choices
Homemade ultrasonic cleaning solutions offer a wonderful starting point—affordable, easy to make, and surprisingly effective for everyday cleaning needs. They empower users to understand the science behind the process and customize their approach. But smart cleaning isn’t just about improvisation. It’s about knowing where the limits lie.
The most effective ultrasonic cleaning setup is the one tailored to both the object being cleaned and the type of dirt you’re trying to remove. Sometimes, that means reaching for vinegar and dish soap. Other times, it means investing in a purpose-built formula that guarantees safety and consistency.
In the end, ultrasonic cleaning is as much about knowledge as it is about technology. Whether you’re cleaning jewelry, tools, labware, or collectibles, make every drop count—by pairing it with the right technique, the right timing, and the right liquid.


