Ultrasonic cleaners are widely used in labs, repair shops, and jewelry counters for one reason: they clean things that ordinary methods simply can’t. From oil-stained carburetors to tarnished rings and microscopic lab tools, these machines use sound waves to deliver powerful, non-contact cleaning. But if you’re a maker, a fixer, or simply curious, you may be wondering: can I build one myself?
The answer is yes—if you understand the principle behind it and are willing to get hands-on with some basic electronics. Building your own ultrasonic cleaner at home isn’t just a fun engineering project—it’s also a practical way to get deep-cleaning results without paying commercial prices.
How Ultrasonic Cleaning Actually Works
The Principle Behind Ultrasonic Cleaning
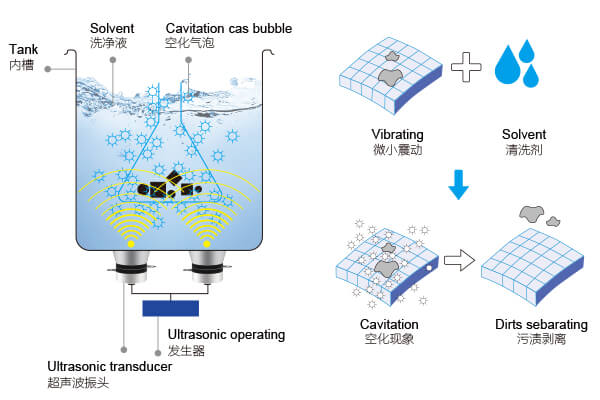
Ultrasonic cleaning works through a process called cavitation, created by high-frequency sound waves—typically between 20kHz and 80kHz—passing through a liquid. As the ultrasonic transducer vibrates, it generates alternating high- and low-pressure waves in the fluid. These waves form microscopic bubbles during the low-pressure phase, which then collapse violently during the high-pressure phase.
This collapse releases energy in the form of localized heat and shockwaves, creating intense scrubbing action at a microscopic level. The result is the dislodging of dirt, oil, oxidation, and other contaminants—even from the tiniest crevices, threads, and holes that are impossible to reach by hand.
The process is entirely non-contact and safe for delicate items. Lower frequencies (around 28kHz) produce larger, more forceful bubbles suitable for tough residues, while higher frequencies (60–80kHz) are gentler and ideal for fine details or fragile parts. When combined with a suitable cleaning liquid, ultrasonic cavitation becomes a powerful and efficient method for deep, damage-free cleaning.
Core Components You’ll Need
At the simplest level, a DIY ultrasonic cleaner includes:
A stainless steel container. This will serve as your cleaning tank. It needs to be durable, non-corrosive, and able to transmit ultrasonic waves. A deep metal food tray or soup pot can work if you’re improvising.
Piezoelectric transducers. These are the devices that generate ultrasonic vibrations when powered by alternating current. You can salvage them from old ultrasonic humidifiers or buy them online. Look for ones rated for at least 28kHz or 40kHz.
Ultrasonic driver circuit or signal generator. This converts your standard power supply into a high-frequency oscillating signal to drive the transducers. Prebuilt driver boards can be found online or built from scratch with some electronics know-how.
A stable power supply. Most ultrasonic driver circuits run on 12V or 24V DC and draw significant current, so you’ll need a compatible regulated power source. Bench power supplies or repurposed laptop chargers are commonly used.
Thermal insulation (optional). If you want your cleaner to operate more efficiently or retain heat, consider insulating the outer wall of your tank.
If desired, a basic heating element or temperature controller can be added, but this makes the setup more advanced.


Assembly Steps
Once you’ve gathered your parts, it’s time to build. Here’s how to assemble a basic ultrasonic cleaner safely and effectively:
Clean your stainless steel container thoroughly to remove any coatings or oils that might block ultrasonic transmission.
Attach one or more piezoelectric transducers to the underside or sides of the container using strong thermal epoxy or ultrasonic-compatible adhesive. Ensure tight contact for efficient energy transfer.
Solder the leads of the transducers to your driver board. Follow the polarity instructions and verify that your circuit matches the frequency rating of the transducers.
Connect the driver board to your power supply, using appropriate heat shielding or a case to prevent accidental shorts.
Add liquid (typically water with a small amount of dish soap or ultrasonic cleaning fluid) to the tank. Ensure the liquid level fully covers the items to be cleaned, but doesn’t overflow.
Turn on the driver circuit and observe the tank. If cavitation is occurring, you should see gentle rippling, fogging, or tiny bubbles forming along the surface and object edges.
Start with short cleaning cycles—one to three minutes—until you verify that your system works reliably and doesn’t overheat.
Below is a video of the installation of the transducer:
Safety Notes and Performance Tips
DIY ultrasonic cleaners work best with small, simple loads. They aren’t intended to replace industrial models, but they’re surprisingly capable for tools, coins, eyeglasses, or bike parts.
Use caution when operating any DIY electronics. Always build in proper insulation and ventilation, and avoid handling electronics with wet hands.
Don’t let items rest on the tank bottom. Use a suspended mesh basket if possible to protect both the items and the transducers.
Avoid using flammable liquids in your homemade unit. Stick with water-based solutions and ensure your workspace is ventilated.
Regularly check your transducer adhesion. If they come loose, efficiency drops significantly or may stop altogether.
Keep the liquid temperature below 60°C unless your container and electronics are specifically rated for heat. Excess heat can degrade adhesives or cause transducer failure.
Should You DIY or Buy?
Building your own ultrasonic cleaner is absolutely doable—and educational. You’ll gain a deeper understanding of ultrasonic physics, electronic assembly, and even fluid dynamics. If you’re a hobbyist who enjoys tinkering, it’s a satisfying challenge.
However, if you need reliable, multi-frequency cleaning, higher capacity, or features like programmable timers and built-in heating, a professional unit is still the best route. Manufacturers like Yunyisonic offer advanced dual-frequency and four-frequency systems with precise controls, tailored for labs, workshops, and industrial users. But even their technology is built on the same core principle—using sound to clean the invisible.
If you want to buy an excellent ultrasonic cleaning machine, welcome to consult us!
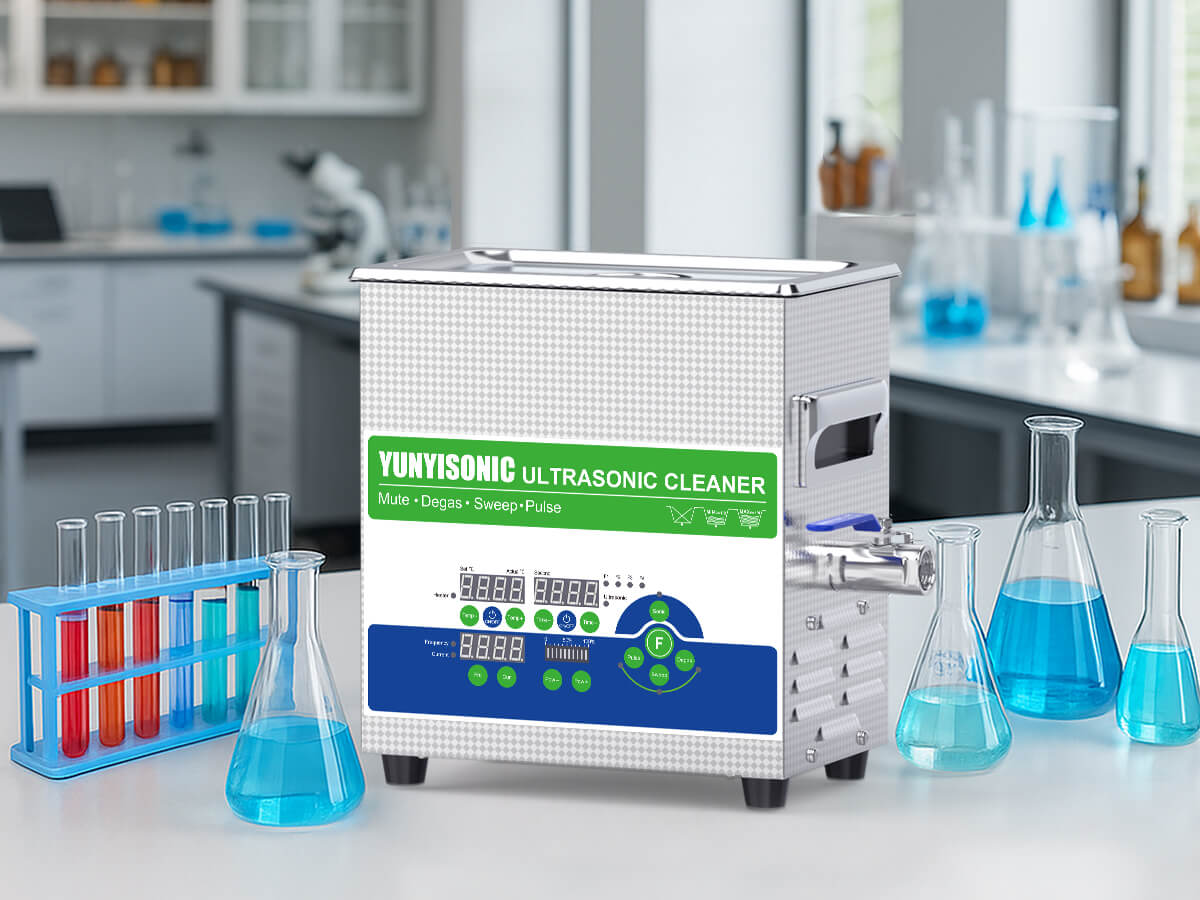
Yunyisonic ultrasonic cleaner